news

Look at the design page for info on the plywood velomobile construction.

Sunday 3 November 2013

for the homebuilders

Lately, I've received numerous requests if I have plans and parts lists of the bike. If you plan to build one from start, it's not a 3-guy-project, as the bike has a very simple basis: a sheet of plywood, bended, and glued to an aluminium tube. It could also be a wooden edge, but that would be seriously thick to get the same strength and therefore heavier. The rear wheel is placed in a separate triangular shaped box inserted from the rear, then the bottom is converted to a double bottom with an extra sheet to give the bike far mor torsional stifness lengthwise.The front wheels have been mounted in a construction that's common in velomobiles: Mac-Pherson. These are some things that are hard to see. About the rest, I'll make some pictures and put them on the blog soon. Intentionally, I don't give a shopping list: all parts are standard bike parts, so you should be able to get them locally. The body is made from 1.5mm plywood and glued with 355 (thin glue type) and 700 (thick glue type) types epoxy from polyservice.nl, reinforcements on all corners of the front wheel boxes with glass fibre sheets. I've only paid attention to the direction of the fibres for the load distribution, the obtained strength was "hoping to be enough".Shaping the body (front/nose section) this way will not give a true speed machine: see movie http://www.youtube.com/watch?v=m6y7Kg7GkWk that I've made from a speed test. Compare it with a side view from a glider air plane and you'll understand. On this blog, I've already posted numerous pictures that give lot of details. Especially for you here some additional pictures:

Tuesday 29 October 2013

centre of attention

Last weekend I went to a local parade here in Tilburg with the wooden mobile. It were the slowest miles ever, but also the most funniest. Along with exceptional good weather, it became a memorable weekend. I've made a small movie of it: http://youtu.be/wcDD0KcPcVQ
Going so slow, everybody can have a good look and you get loads of reactions. Children are always funny. See for yourself in the movie.

Thursday 10 October 2013

Are you interested in taking over ?

1st weekend of oktober, at Breehees, Goirle, a gathering of recumbent riders was organized. Being this very, very near to my house, I just had to go there with the PlyMobile. I expected lots of talk and discussions about the bike. I was just right. Several people had to go to the local supermarket, so I guided them, leading them with the plymobile.                     
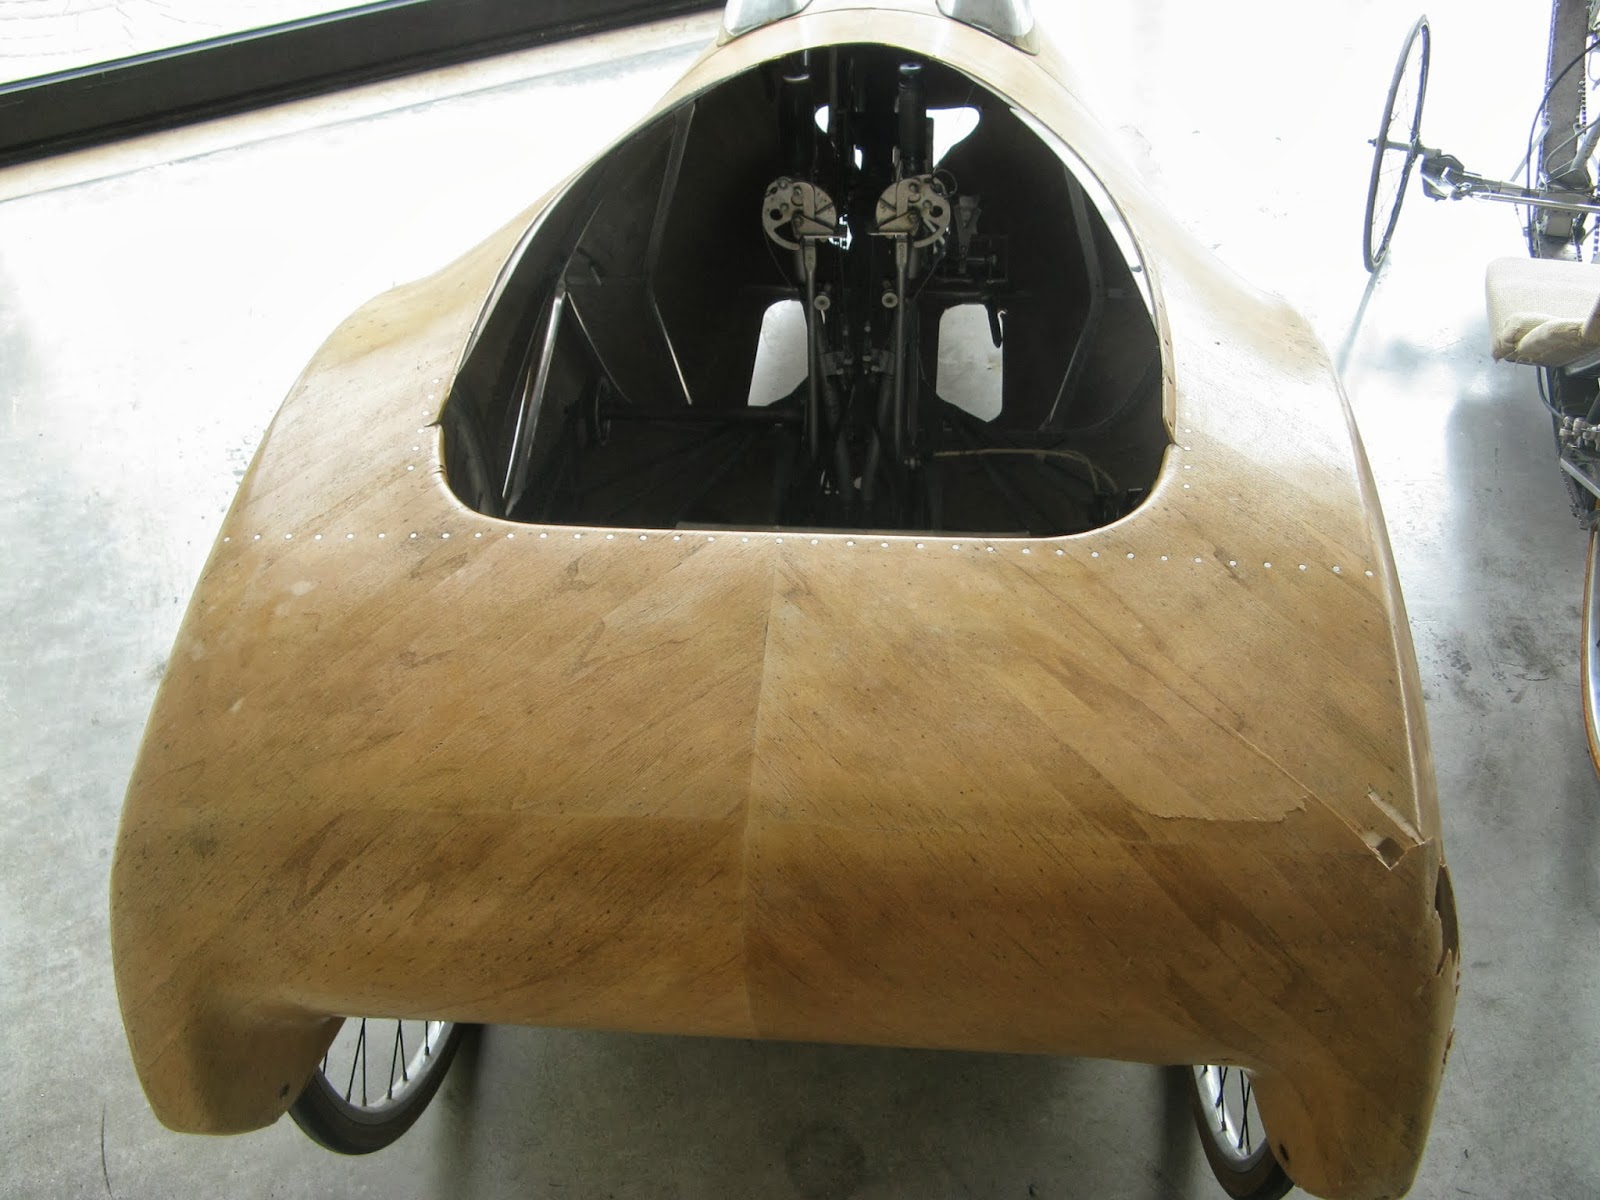
I deliberately fixed the front supension and went full throttle, purely to test the strenth of the glass fibre reinforcements. I heard cracking like noises along the way, but couldn't find a single crack afterwards. test succesful, strong body I'd say.  I don't know if the wheel covers work well, at least they look good. In this picture I show the chain tunnel onder the bottom: made from plastic bags. Theat's really cheap and ultra low weight. But it easily adds friction because of the chain hanging into these bags. The idea is good anyway. 
 
The time this picture was made, most velonauts were chatting with each other inside, but still some people wanted to see the bike. Another day, someone else did take a ride with the bike and I followed with a quest. The bike, being 10 kg lighter than a quest, took off much quicker and I had to catch up with the heavier quest. The difference was clearly noticeable. That bike was fitted with a speedometer: the PlyMobile does 36 km/h, faster than a regular bike, but way slower than a quest.

Now the bike works good and reliable, it's time for me to start my own wooden builds. Anyone interested to further develop this PlyMobile? You can contact me (Joost Evers, you can see me in the pictures lately) for questions at fietswiel@home.nl or the person that is the owner of this blog, Titus van den Brink.

Tuesday 8 October 2013

cracks spring support plate

after the tilburg speed trials and trip back home over sharp speed bumps, cracks appeared at the place of the support rings for the compression springs. Not surprisingly where the load acts perpendicular to the fibres of the glass reinforcement.

Larger aluminium support disc placed to spread the load.

Saturday 21 September 2013

A post from Italy

Remigio Maladino mailed me some interesting pictures of a plywood velomobile:


He writes: "All three vehicles (one velomobile, one trike without fairing but quite interesting for the very accurate construction, and an original plane-bycicle toy made during the fascist period) in the pictures are currently for sale in a carrozzeria in my town, Treviso. Only for my curiosity I asked about prices at the beginning of Summer. The owner said he paid nearly 20.000 euro for the lot. I don't know if I had to believe it or not and in any case I was not at all interested in buying it, I was only very interested about the peculiar shape and especially about the technical solutions of the two trikes: The one I sent you the first pictures is very interesting, I suppose also for you  for the fact that the wood body was surely built around a former, a shape with different layers of veneered  wood, not plywood like your velomobile. In this way it was possible to have double curved sheets but at the price of a much higher quantity of work.


It was interesting for me to see that you had the privilege of working and developing the Alleweder. I agree with you when you say that the great success of the diy kits was probably due to the self satisfaction that may derive to build your own velomobile. In addition to that there is alsothe fact that it can be forwarded all over the world with three boxes, or like some say that it can be easily Ups-able!

The wooden velomobile in the picture as i already told you was built by an independent mechanical engineer - sorry I forgot the name at the moment  (will probably ask it tomorrow and let you know more) in the Torino area in the seventies. In the other pictures you can spot the engineer with the famous, at least for me -and at that time younger- designer Giorgetto Giugiaro (VW Golf, Fiat Panda, Fiat Punto etc).
"


I like the craftmanship of this machine. It must have taken  a tremendous effort to design and built it. The design was made in the 70-ties but it associate it with the 30-ties. Before Dupont and the like developed glass fiber reinforced polyester. It shows some resemblance with the work of Harald Winkler.


Friday 6 September 2013

wedstrijd tilburg

September 1st, a competition with other recumbents. The ride to the track and the competition itself were a very good test for the front suspension. The bike did very well and handled very good. At the end I was confident enough to go flat out.
I noticed that the right side suspension works perfectly as expected, but the left side is stuck. A little work needed.
I've made a video of the competition day: http://youtu.be/kJHP4ILLQwc

Tuesday 20 August 2013

Installing front suspension

After machining 4 aluminium discs that keep the metal springs aligned the front suspension was re-installed.

At first ride trial the steering proved almost lethal, it had to be adjusted to be far less reactive for more precision. Otherwise the bike wil definitely turn upside down. As can be seen in this picture, the chosen spring allows a few mm's negative travel to cope with holes.

Happy cycling. It all works fine. finally a face behind these repairs. Finally some driving at speed. I really let the suspension do it's job over speed bumps, kerbs and some brick road.
Maybe you'd like to meet me? Come to the cycling track in Tilburg september 1st, where a recumbent meeting will be held.


Maybe you'd like to meet me? Come to the cycling track in Tilburg september 1st, where a recumbent meeting will be held.

Tuesday 16 April 2013

Rolling again

Joost repaired the body and mounted the wheels again

The 1.5 mm plywood is now sandwiched between glass fabric reinforced epoxy.


Wheel suspension in place. The nylon ball joints are very light but are they reliable? One can see here there is no beam parallel to the chain. It is the monocoque that takes the load.

Saturday 30 March 2013

Laminating the wheel box

Joost has laminated the heavy loaded parts of the wheel box on both sides. He used 160 grams glass fabric ('keper') and epoxy resign. By applying glass on both sides of the plywood Joost has created a sandwich panel: Very strong stiff, and light. I like the idea that we can reinforce heavy loaded parts of the body in this very simple and effective way.

I think Joost will get the plywood velomobile on the road next week! I have bought a QuestXS and we plan to compare the aerodynamics of both velomobiles. For me the QuestXS is a very nice alternative for commuting. The shape is very nice but she is rather heavy (34 kg). I wonder how much less the aerodynamics of the plywood velomobile is. The plywood velomobile weighs 23 kg only.

Developing the plywood velomobile is a lot of work. I try to involve others into the project. Let me know if you are interested.

sanded

making a pattern


one hardly sees the laminated portion

here you also see there is no connection along the chain: the body is strong and (almost) stiff enough without it


Monday 18 March 2013

Joost is fixing the body

My new colleague Joost is fixing the body. Together we have glued the broken parts as good as possible and with remarkable success. Joost will laminate glass fabric on both sides. Laminating the plywood on heavy loaded places is a very simple and effective way to reinforce the body.


Monday 7 January 2013

Darin Wick

Look what Darin Wick has made! I like the short seal like tail. Contrary to my design of the plywood velomobile (or better the design of Bart Verhees) in Darins design the seams are in the longitudinal direction. The effect is beautiful lines but a lot of work to connect them. Quest-style closed wheel boxes are easy to imagine too. Darin published a python script to plot the parts.

1 to 5 model copied from Darins website
https://lh4.googleusercontent.com/-MgGWIIZ389E/Tt5_haHEGDI/AAAAAAAAA3s/4CYaZJrOh-4/s400/2011-11-20_21-51-47_902.jpg
inside